

Jalapeño Cheese and Bacon Crescent Roll Pinwheels


This one hack is about to become your new party trick. You're welcome in advance.
Y'all. I need you to stop what you're doing and listen to me for a second, because I am about to change your entire party game. These jalapeño cheese and bacon crescent roll pinwheels are the kind of thing people ask you to bring to every event for the rest of your life. Fourth of July cookout? Done. Birthday party? Done. Baby shower? Absolutely done. A random Tuesday night with the family and you just want something that feels a little special? Also done.
The best part? You can find everything you need at any regular grocery store. Nothing fancy, no specialty ingredients, no Pinterest rabbit hole that ends in a three-hour ordeal. Just a few simple things that — on their own — are already delicious. But combined? Girl. WOW.
What You'll Need
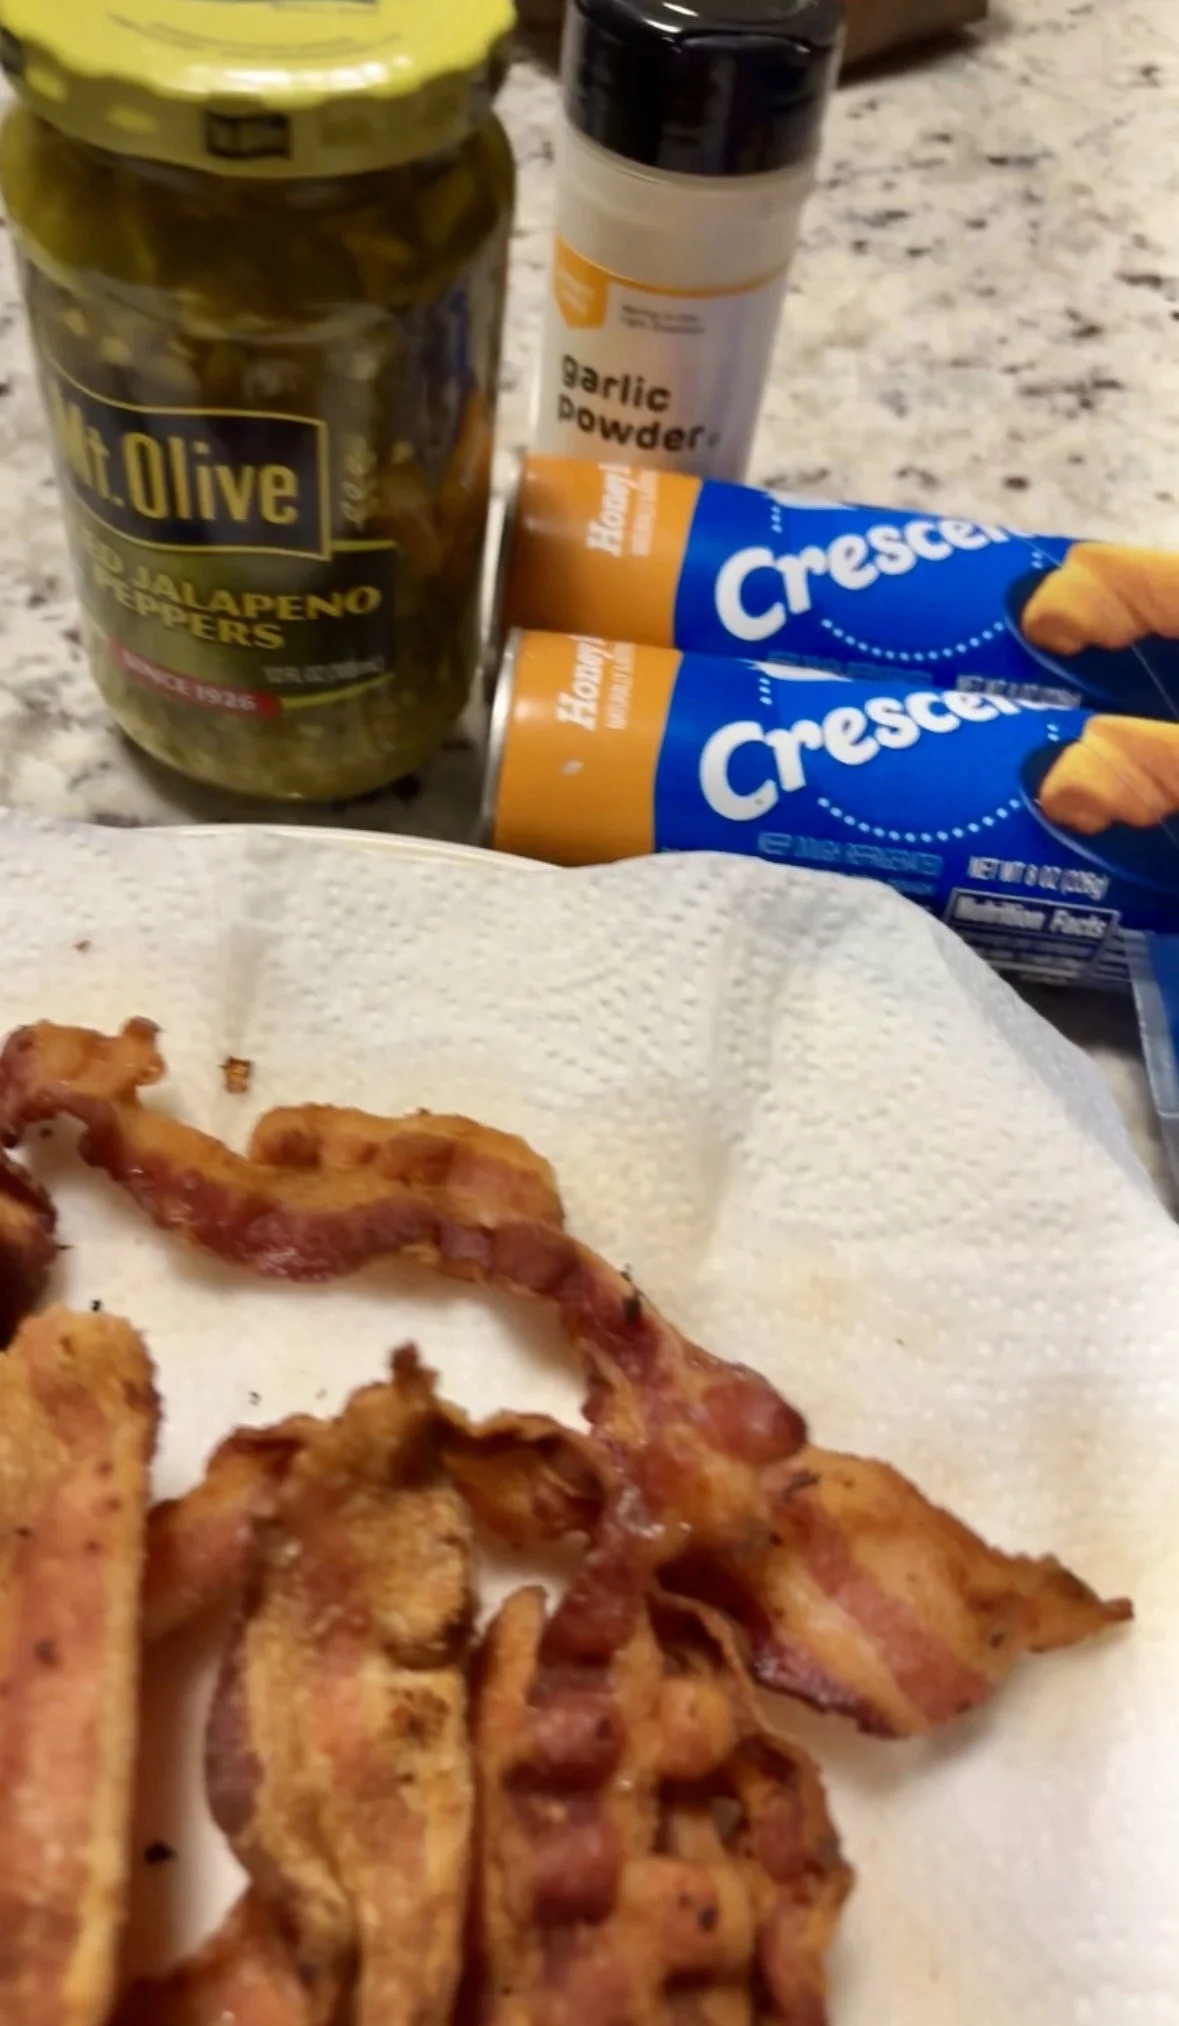
Cans of crescent roll dough (each can makes about 9 rolls depending on how you cut them — plan accordingly for your crowd). Pro tip: grab the honey butter kind if you can find it. I tried it on my last cook and, oh my goodness, it takes these to a whole other level.
Shredded cheddar cheese (or honestly, whatever cheese makes your taste buds happy — no rules here)
Diced pickled jalapeños
A pack of bacon — any kind works
Optional but highly recommended: a jar or can of your favorite cheese dip for dipping the finished rolls. Trust me on this one.
Let's Talk Bacon First
Fry your bacon until extra crispy. And I mean EXTRA crispy — like, almost burnt. I know that sounds intense, but here's the thing: once the bacon is wrapped up inside that dough and baked, it softens up. So if you don't cook it past the point you think you should, you'll end up with chewy bacon inside, and nobody came here for that. Cook it hard, and it'll be perfect once everything's done.
Once it's cooked, toss it in a zip-loc bag and crumble it with your hands to get nice little bacon bits throughout every bite.
Note: If you'd rather skip the bacon frying situation entirely, just grab a bag of pre-made bacon bits from the store. No shame in that shortcut at all — we're here to make the most of our time, not spend it all at the stove.
The Crescent Roll Hack That Changes Everything
Here's where the magic happens — and why this is such a game changer compared to just making regular crescent rolls out of the can.
Keep your crescent roll cans in the fridge until you're ready to use them. The colder the dough, the easier it is to work with. Don't let it sit out and get warm on you — work in batches if you need to.
When you're ready:
Open the can and take the full dough roll out in one piece.
Do NOT tear along the perforated edges like you normally would. Ignore those. They don't exist today.
Instead, lay the entire piece of dough out flat on a lightly floured surface or a non-stick board.
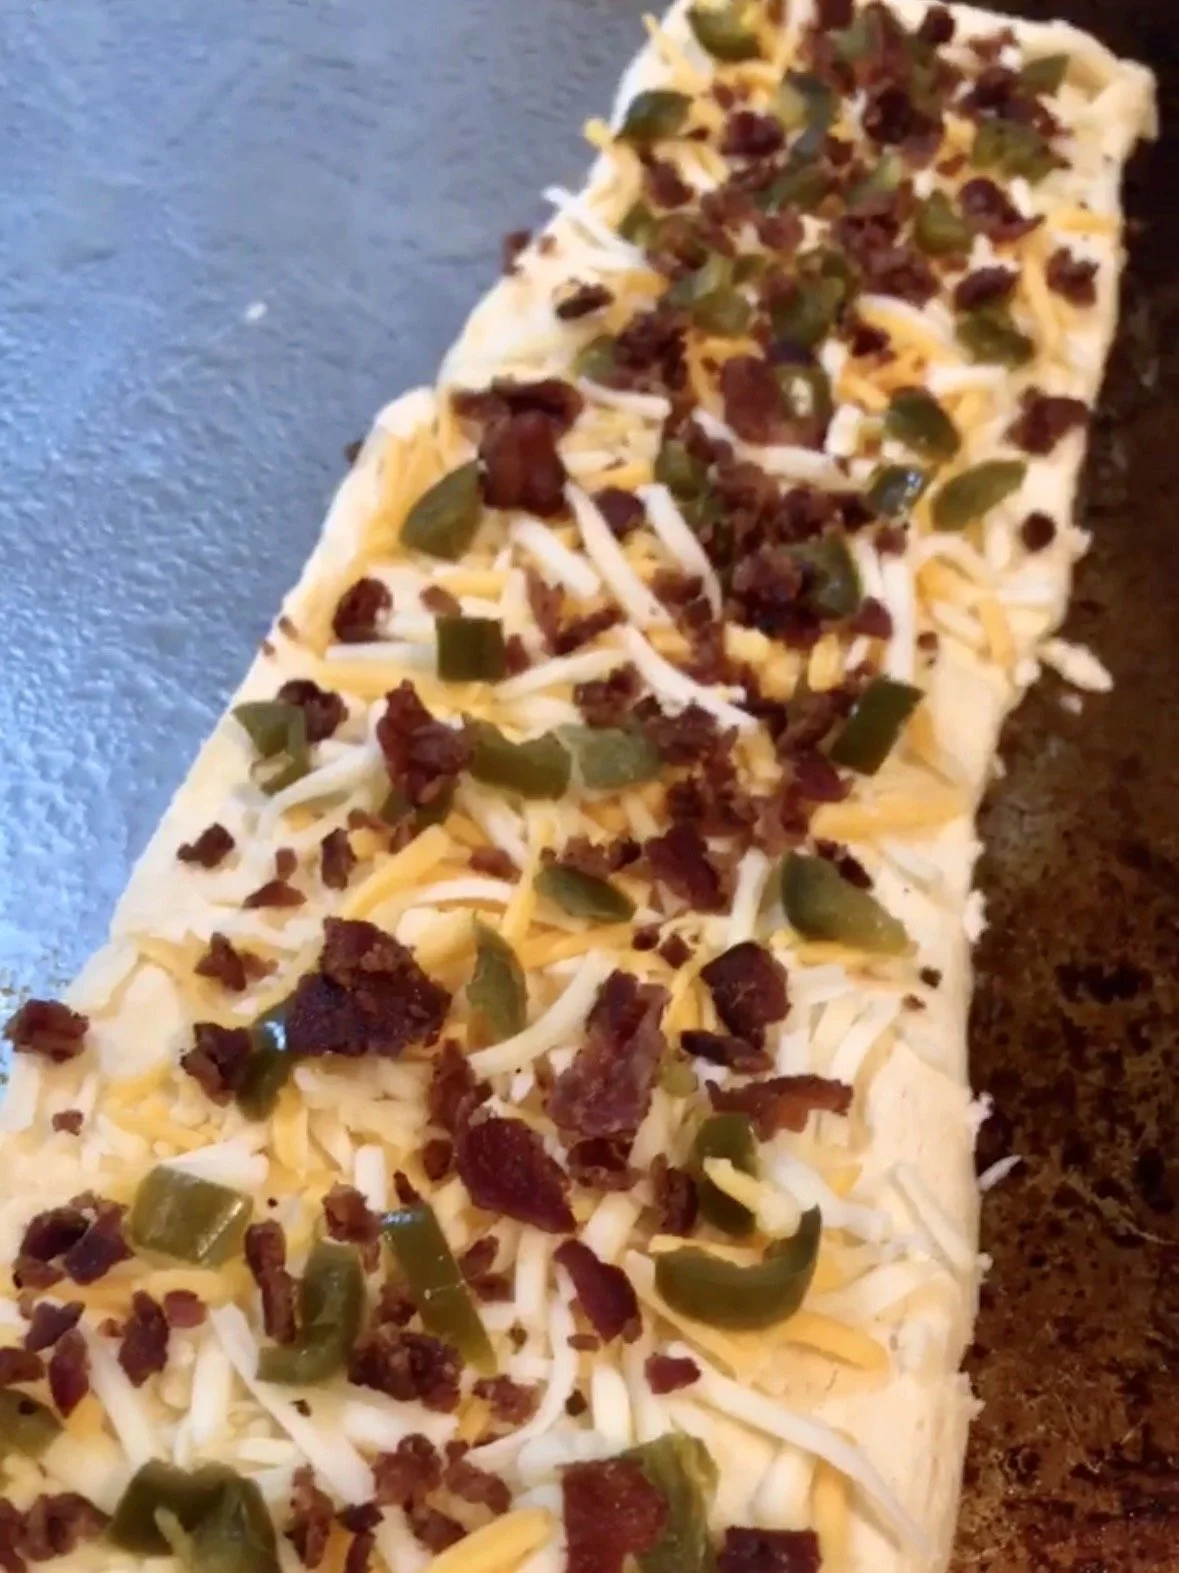
Use your fingers to gently press and pinch all the little seams together so the whole thing is one solid, smooth sheet of dough.
Sprinkle your bacon bits, shredded cheese, and diced jalapeños all over the top — be generous, y'all.
Starting at one of the short ends, gently roll the dough into a tight log.
Slice the log into mini rolls, about an inch thick each.
Once you've cut them, pop them back in the fridge on a plate while you finish the rest of the cans. Keeping them cold helps them hold their shape and makes them easier to place on the pan.
Bake 'Em Up
Preheat your oven and follow the temperature on the crescent roll can — typically 375°F (or 350°F for dark pans). Place your rolls on a greased baking pan with a little space between each one.
Bake for 9 to 13 minutes, but don't be surprised if they need a couple extra minutes — all those fillings add a little heft. You'll know they're done when they're golden brown and your kitchen smells absolutely incredible. Don't rush it. Golden brown = done. Pale = not yet.
Pack 'Em Up and Share 'Em
Pile the pinwheels on a serving tray, toss them in a picnic basket, bring them to the cookout — whatever the occasion calls for. Add a little bowl of cheese dip on the side for dipping and watch them disappear in approximately four minutes flat.
They're best served warm, straight from the oven. But if you're bringing them somewhere and they've cooled down a little? Still delicious at room temp. These things are just winners no matter what.
Make them once and you'll understand why they're requested at every single thing we show up to.
Want to remember this recipe?
PIN IT to Pinterest — or —Shop Momma's Kitchen Items